Usage
This guide covers the basics of using Apiary's interface and features.
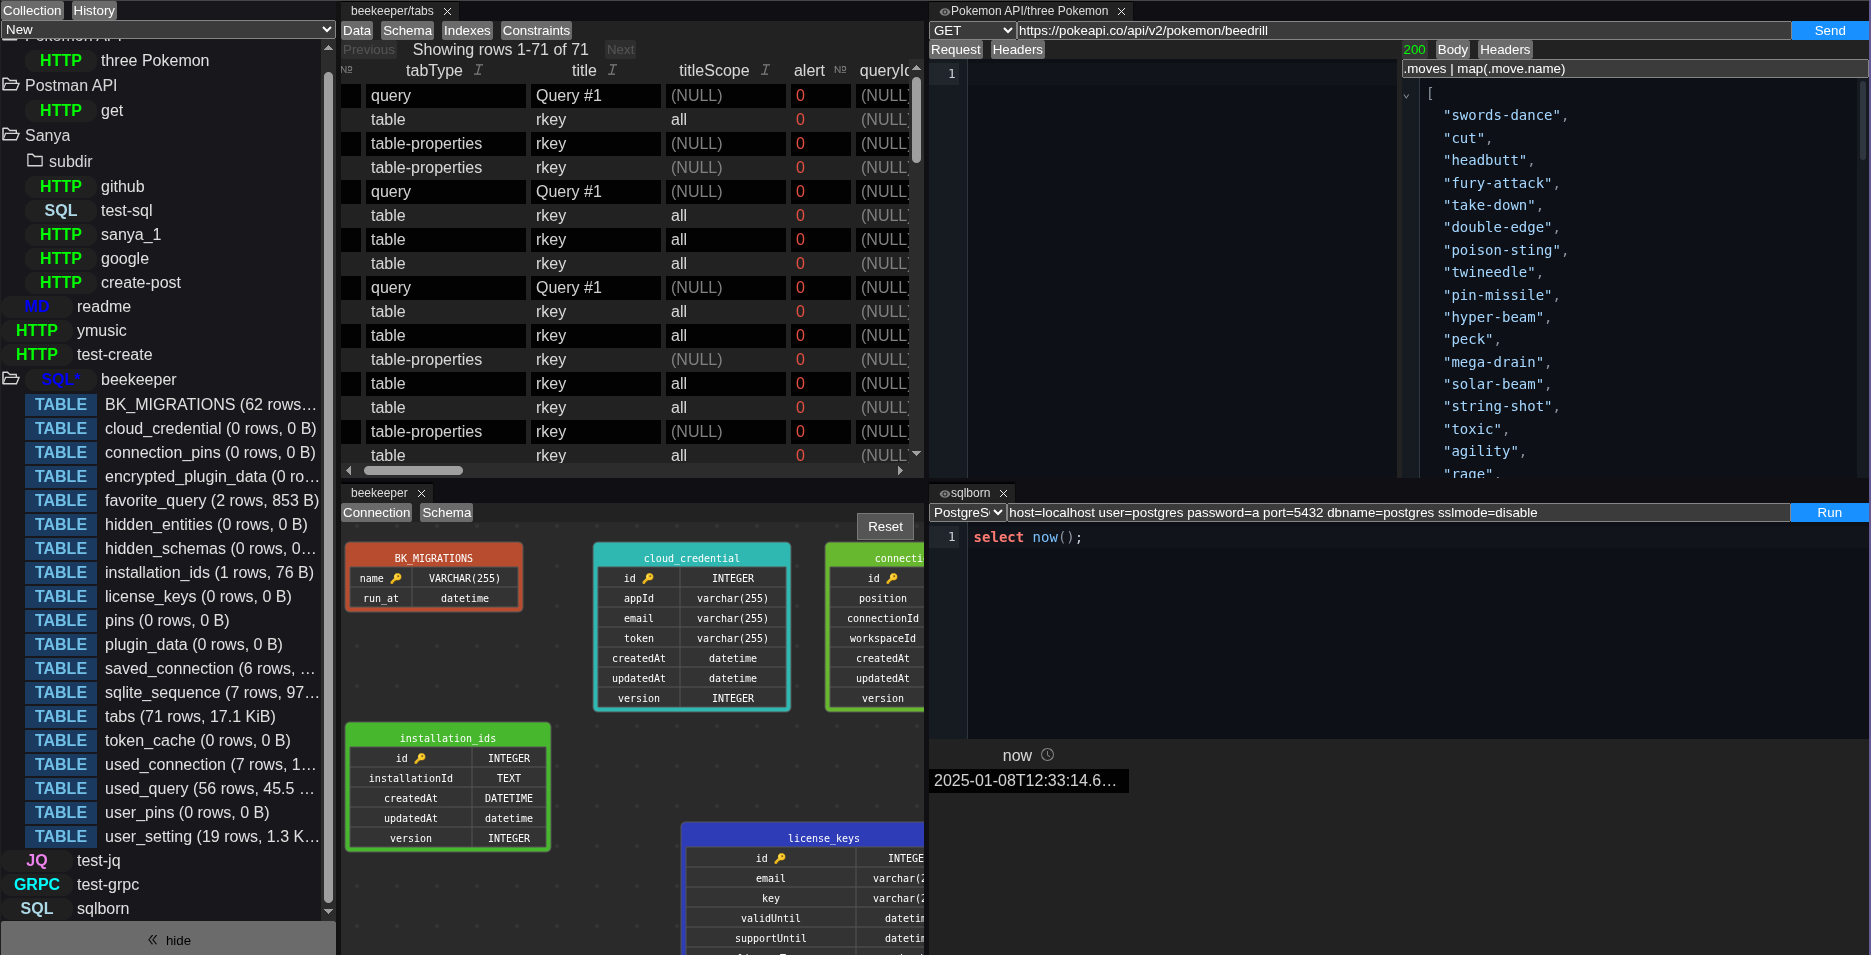
Interface Overview
When you first open Apiary, you'll see the main interface divided into several areas:
┌────────────────┬────────────────────────────────────────────┐
│                │                                            │
│                │                                            │
│                │                                            │
│  Sidebar       │              Main Workspace                │
│  (Collections) │              (Tabs & Panels)               │
│                │                                            │
│                │                                            │
│                │                                            │
└────────────────┴────────────────────────────────────────────┘
Sidebar
The left sidebar shows your collections tree:
- Directories: Folders to organize requests
- Requests: Individual queries (HTTP, SQL, gRPC, etc.)
- Datasources: External collections (OpenAPI, databases, file systems)
- Recently Opened: Quick access to recent requests
Main Workspace
The main area uses a tabbed interface powered by GoldenLayout. You can:
- Open multiple requests side-by-side
- Split panels horizontally or vertically
- Drag and drop tabs to reorganize
- Close tabs with the × button
Menu Bar
The top menu provides access to:
- File: New request, save, import/export
- Edit: Undo/redo, copy/paste
- View: Toggle sidebar, theme, zoom
- Request: Perform request, cancel, settings
- Help: Documentation, about
Creating Your First Request
- Click File → New Request or press
Ctrl+N - Select a request type (HTTP, SQL, gRPC, etc.)
- The new request tab will open in the main workspace
- Configure the request (URL, query, parameters, etc.)
- Click the Perform button (or press
Ctrl+Enter) to execute - View the response in the right panel
Request Types
Each request type has its own configuration interface:
HTTP Requests
- Method: GET, POST, PUT, DELETE, etc.
- URL: The endpoint to call
- Headers: Key-value pairs for HTTP headers
- Body: Request body with syntax highlighting
- Parameters: Query parameters and form data
SQL Queries
- Database Type: SQLite, PostgreSQL, ClickHouse, etc.
- Connection String: DSN for the database
- Query: SQL editor with autocomplete
- Parameters: Query parameters for prepared statements
gRPC Calls
- Server Address: gRPC server endpoint
- Service/Method: Select from reflection or proto files
- Request Message: JSON format for the request
- Metadata: Key-value pairs for gRPC metadata
Redis Commands
- Server Address: Redis server endpoint
- Command: Redis command (GET, SET, etc.)
- Arguments: Command arguments
- Database Index: Select Redis database
JQ Transformations
- Input: JSON input (can be from another request)
- JQ Query: JQ filter expression
- Output: Transformed JSON result
Markdown Documents
- Content: Markdown editor with live preview
- Rendering: HTML preview with styling
Diff Comparisons
- Left/Right Inputs: Two text editors for comparison
- Automatic Detection: JSON vs text diff algorithms
- Real-time Updates: Live diff with debouncing
- Output: Color-coded differences with statistics
Performing Requests
Once you've configured a request:
- Click the Perform button (▶️) in the navigation line
- The response will appear in the right panel
- Response details (status code, time, size) show in the status bar
- Use tabs to switch between different response views:
- Body: The main response content
- Headers/Metadata: Response headers or metadata
- Info: Performance metrics and timing
Working with Responses
JSON Responses
- Syntax highlighting with collapsible sections
- JQ query bar to filter and transform
- Copy button for quick copying
Table Responses (SQL results)
- Sort by clicking column headers
- Filter using the filter bar
- Export to CSV or JSON
Binary Responses (images, files)
- Image viewer for images
- Hex viewer for binary data
- File type detection
HTML Responses
- Built-in browser rendering
- Toggle between source and rendered views
Organizing Requests
Creating Directories
Right-click in the sidebar and select New Directory to create folders for organizing requests.
Moving Requests
Drag and drop requests between directories in the sidebar.
Renaming and Deleting
Right-click a request or directory and select Rename or Delete.
Keyboard Shortcuts
| Shortcut | Action |
|---|---|
Ctrl+N | New request |
Ctrl+O | Open request |
Ctrl+S | Save request |
Ctrl+Enter | Perform request |
Ctrl+Shift+P | Command palette |
Ctrl+Tab | Next tab |
Ctrl+Shift+Tab | Previous tab |
Ctrl+W | Close tab |
Ctrl+ | Split panel |
Command Palette
Press Ctrl+Shift+P to open the command palette, which lets you quickly access all features without using the mouse.
Next Steps
Explore the specific request type guides to learn more about each feature: